How the project began
Tomer and me attended this year an event called Geekcon-Green, an israeli hackathon where the participants create projects around the idea of sustainability. Our idea, was to build a solar cooker, a device that cincentrates the sun rays into a cooking vessel, like a small pot.
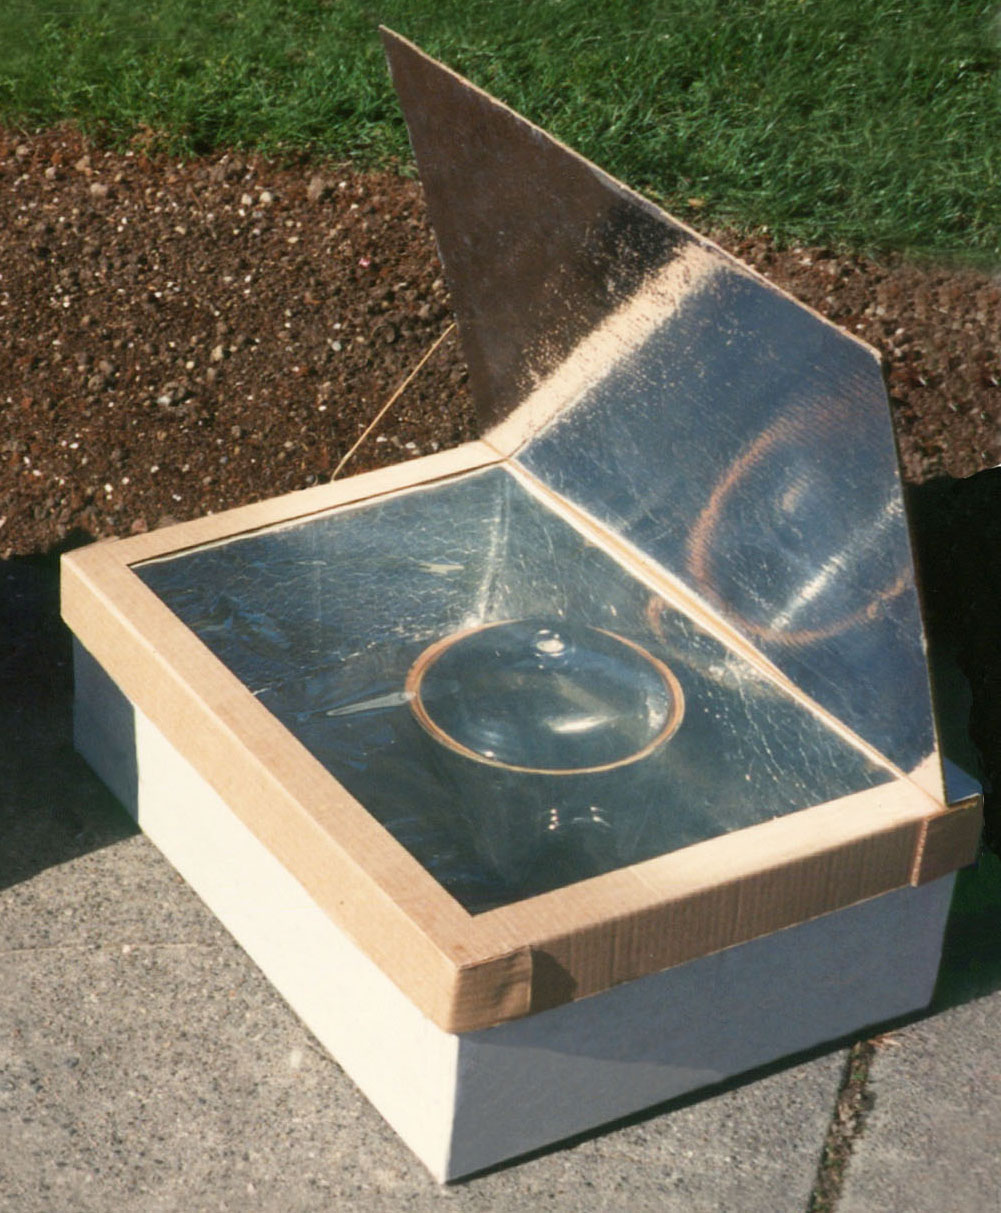
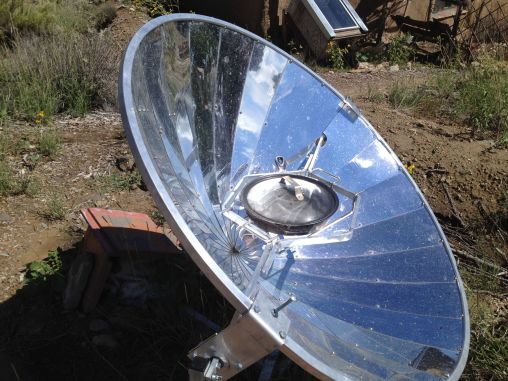
There are many ways to achieve such a thing, two very popular are the solar box cookers, and parabolic mirror cooker. I must admit that we did not research which way is the most efficient for cooking in terms of power efficiency, building cost and complexity, we wanted something different… that is less common – for funs.
We chose to build the cooker based on the Concept of fresnel mirror, it is an array of many mirrors, all tilted in an angle to focus the light to one center. These devices are common in big Thermo-Solar power plants, even though now the technology is inferior to modern Photo-Voltaic solar panels, though, they are still a thing of beauty to drive by.

The core ingredient in this project is a good reflective material, we found is both amusing and somewhat fitting for a green convention, to use hard disks found inside hard drives:
and oh my god, how many hard drives did we take apart…
The design
Based on this idea we have designed in Solidworks a scheme to position the disks in a way that they concentrate the total incident sun-light to the area just a bit bigger than the size of one disk. Two other constraints were kept in mind – first, the arrangement must be compact, second, the disk’s centers are all on the same plane.
To estimate the power achievable by such configuration, all we need to do is to calculate the total area (A) and multiply it by the energy flux of the sunlight. consider a hard drive disk, with external Diameter (D), and internal diameter (d).

So the area of N plates is written as:
The power coming from the sun, is at best 1300 (W/m^2), so the total power gathered is:
I admit, it is not much, but keep in mind that the design is scalable, for us it was enough to make a proof of concept, and wanted to avoid complexities that come with higher size and weight.
The solution we came with is the following:
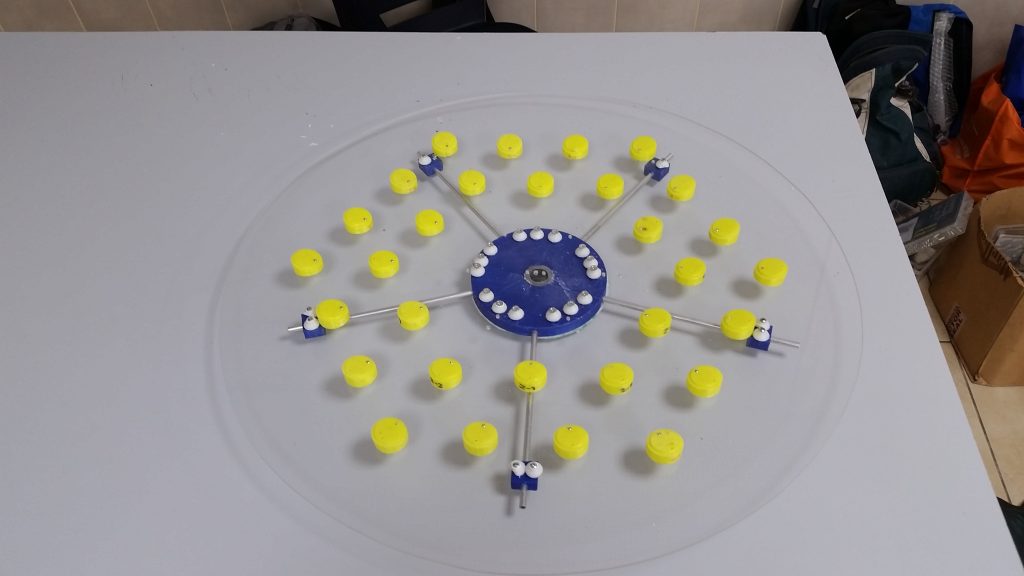
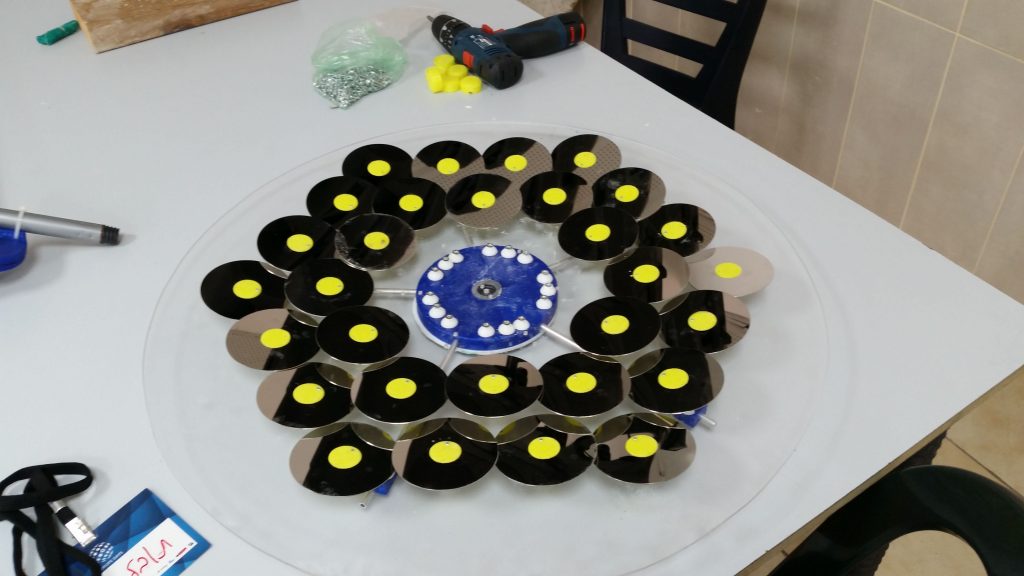
Using 3D printed seats to position the disk’s in the correct position and angle. The disks were glued with cyanoacrylate glue (superglue) to the seat and the seat was attached to the acrylic plate with screws. The backside of the plate was reinforced with a metal rods connected to a 3D printed central hub (PETG):
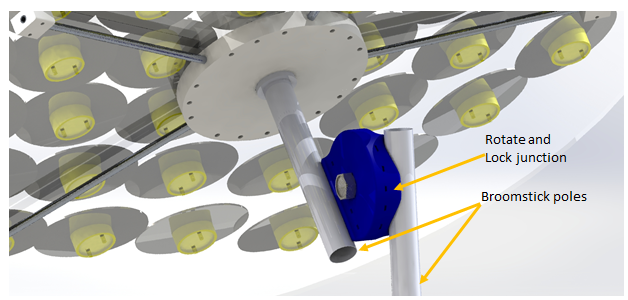
Now that we had a good base for the optic part of the project, we still needed to be able to direct the mirrors toward the sun, to maximize the amount of light focused. This was done by taking apart a broom stick and cutting it into two parts, one as the base the the other as a rotatable arm, the broom itself was cannibalized for the female thread, which was inserted into the central hub mentioned before, so the mirror array was screwed into the arm.
A plastic rotatable junction was designed to connect the two poles, so the mirrors angle can be adjusted and locked:
The building process
First, we printed the junction part, and the back frame of the acrylic plate, and assembled them together:
we found that the junction was surprisingly stiff even though it was attached to the poles with zip-ties! The hub was not so bad, but the holes where the metal rods are inserted were a bit too small and it took quite a lot of hammering and was nerve wrecking, as destroying a night-long print and 150g of plastic is quite a shame.
We proceeded by cutting the acrylic plate into a circle
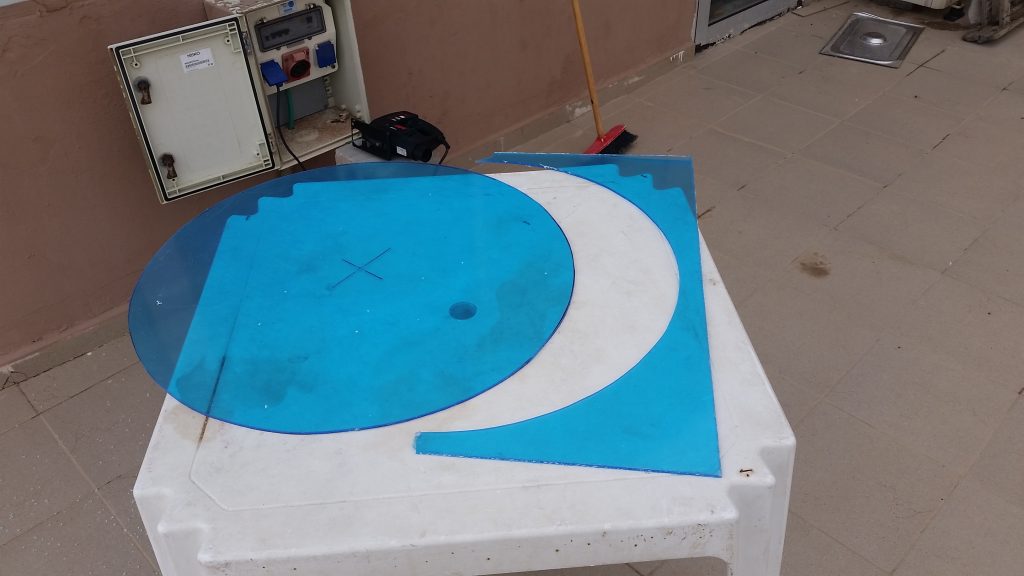
the next step was to drill the mounting holes through the plate… about a 100 of them…. to ease the process, we printed the drawing of the holes and the circle and positioned them under the acrylic plate and proceeded with the drilling using those markings. WHAT WE DID NOT KNOW, is that the printer rescaled the design so that everything was slightly contracted, and that screwed up the focusing effect quite a bit :((((
we mounted the seats and the backbone to the plate
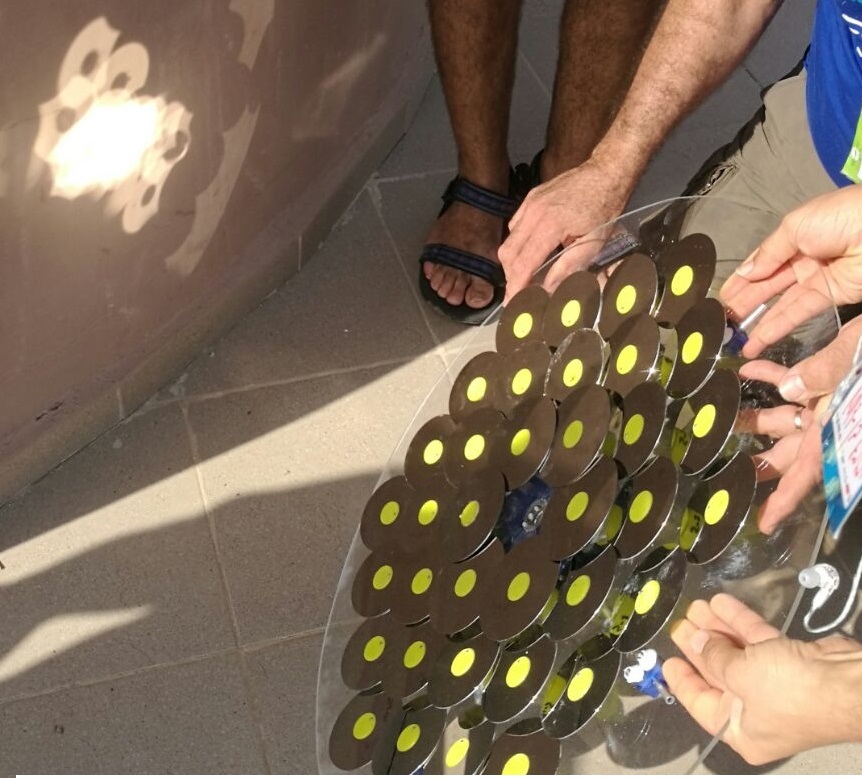
and then we went out to play under the sun!

As seen above, some of the disks were a bit out of place, but that was just the result of not sitting the disks flat on the seat when we glues them, but the biggest problem is the smear of the hot-spot, that is the result of the rescaling catastrophe we mentioned before.
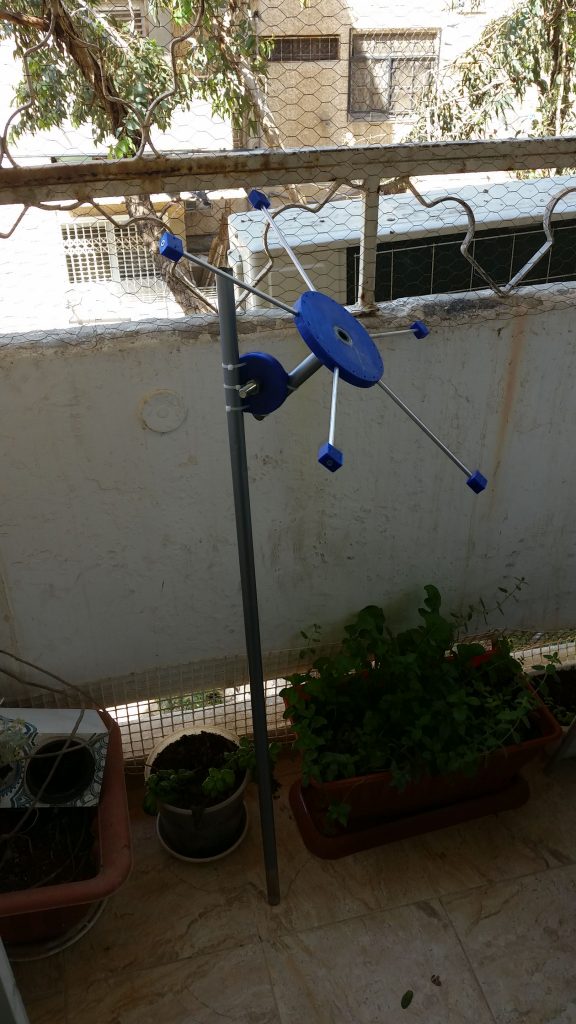
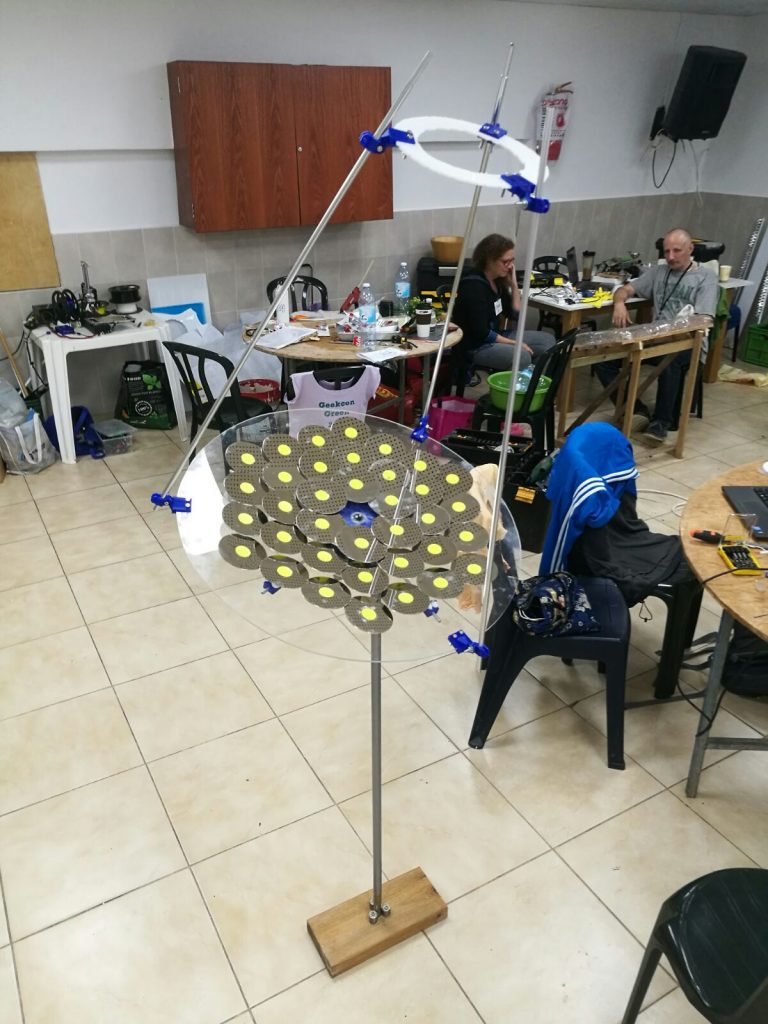
And so we assembled everything together – the poles, the kettle and the adjustable cookware mount. The base pole was pressured between three doubly stacked rotational ball bearings, all screwed into a wooden base. Yes, the base is not very stable as it has quite a small footprint, we later enlarged the it, a while after taking the photo.
Our progress in the geekcon-green convention was too fast that we decided to improve the design, and motorize it so it can follow the sun automatically as it moves through the sky. the result was the following:
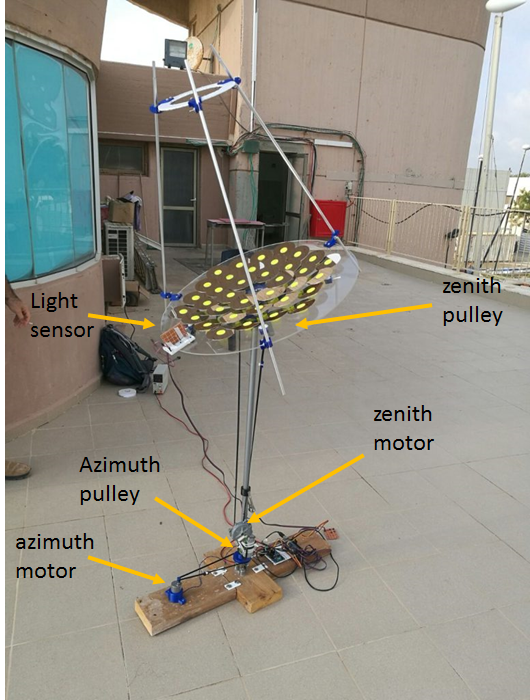
Overnight we made a really crappy mechanism under minimal sleep, and documentation of the process is non existent, so let us summarize this beast real quickly – we used two DC motors to connect to rotate the azimuth and the zenith of the mirrors, the azimuth was controlled by a small DC motor coupled to a pulley on the base pole with a timing belt. The azimuth was controlled with a high torque DC motor coupled to the second pole’s pulley via another timing belt. A light sensor made of two LDR sensor was used to position the solar cooker toward the sun on the azimuth axis, and we just didnt have time to do the same for the zenith rotation.
We know how blurry and and lacking the description of the last paragraph is, there are two reasons why, the first is that we lack a lot of the images as we were too busy struggling to make the engineering blasphemy you can see above, and the second is that we are planning to make the design much better and take the time to document everything, and maybe cook some eggs as well, so stay tuned.
and here is a small teaser of our progress:
Very nice! congrats for the new blog!
If you really want it to be scalable (which is a great idea) I suggest using a design based on a geodesic structure (instead of the solid perspex plate)
This will minimize the weight of the structure holding the disks, and a geodesic dome is scalable to any size while maintaining its strength.
The only thing that will change is axle and motor, I have a nice idea for some scalable approach for that.
Great work you guys are awesome!
Thank you very much! I thought about making connections between the disks, but i was afraid that it would either break or would not be very stiff.
If you have a good idea on how it can be done, we would love it if you could publish a small article on the design!